
Guide
Design for Print in Nigeria: CMYK, Bleed, DPI and File Setup
A design can look excellent on a phone or laptop and still produce a disappointing print. Colours may shift, images may look soft, or important text can be trimmed too close to the edge.
This guide explains the essential print setup for business cards, flyers, brochures, packaging, books, labels, branded clothing and more. Use it before sending your artwork to print in Nigeria.
1. Start with the correct finished size
Set up the document at the exact finished size of the product you are ordering. For example, a standard business card is 3.54 × 2.17 inches, while flyers and brochures come in different sizes depending on the job.
If you are unsure which size to use, ask before designing. Starting with the right dimensions prevents resizing, distorted artwork and unexpected layout changes later.
2. Use CMYK colour mode
Screens use RGB, which is made from red, green and blue light. Professional printers use CMYK, made from cyan, magenta, yellow and black ink.
That is why colours can look different after printing when a file was designed only in RGB. Set your file to CMYK at the beginning whenever your software allows it. Bright screen colours, especially neon blues, greens and pinks, may print more muted than they appear on a screen.
For brand colours that must be exact, share your approved colour reference or Pantone value with us before production.
3. Use high-resolution images at 300 DPI
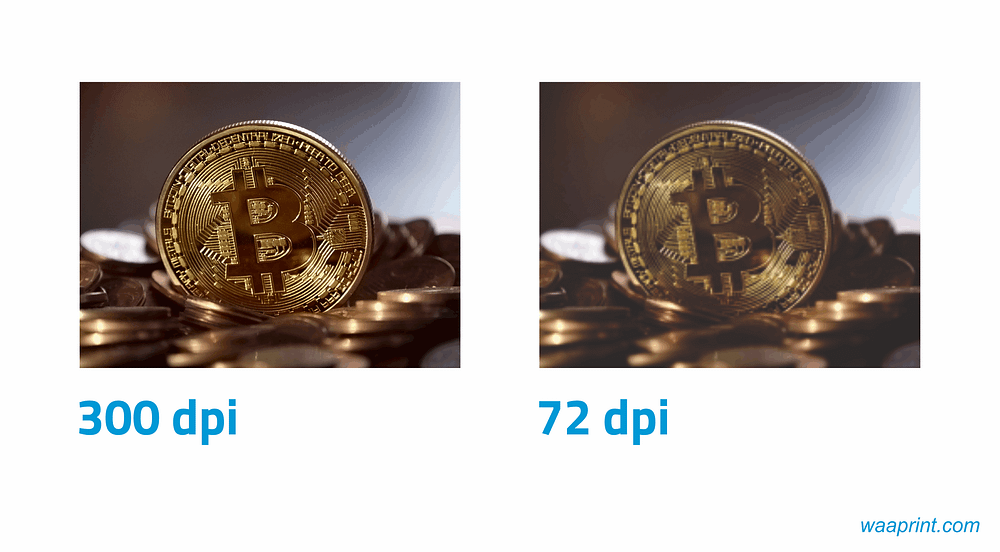
Use clear, high-resolution photographs and graphics. For most printed products, 300 DPI at the final print size is the reliable standard.
A small image downloaded from social media may look sharp on a phone but become blurry when enlarged for print. Avoid screenshots, compressed WhatsApp images and images copied from websites unless they are high enough resolution for the product size.
4. Add bleed, trim and a safe area
Printing and cutting are physical processes, so artwork needs extra room around the edges.
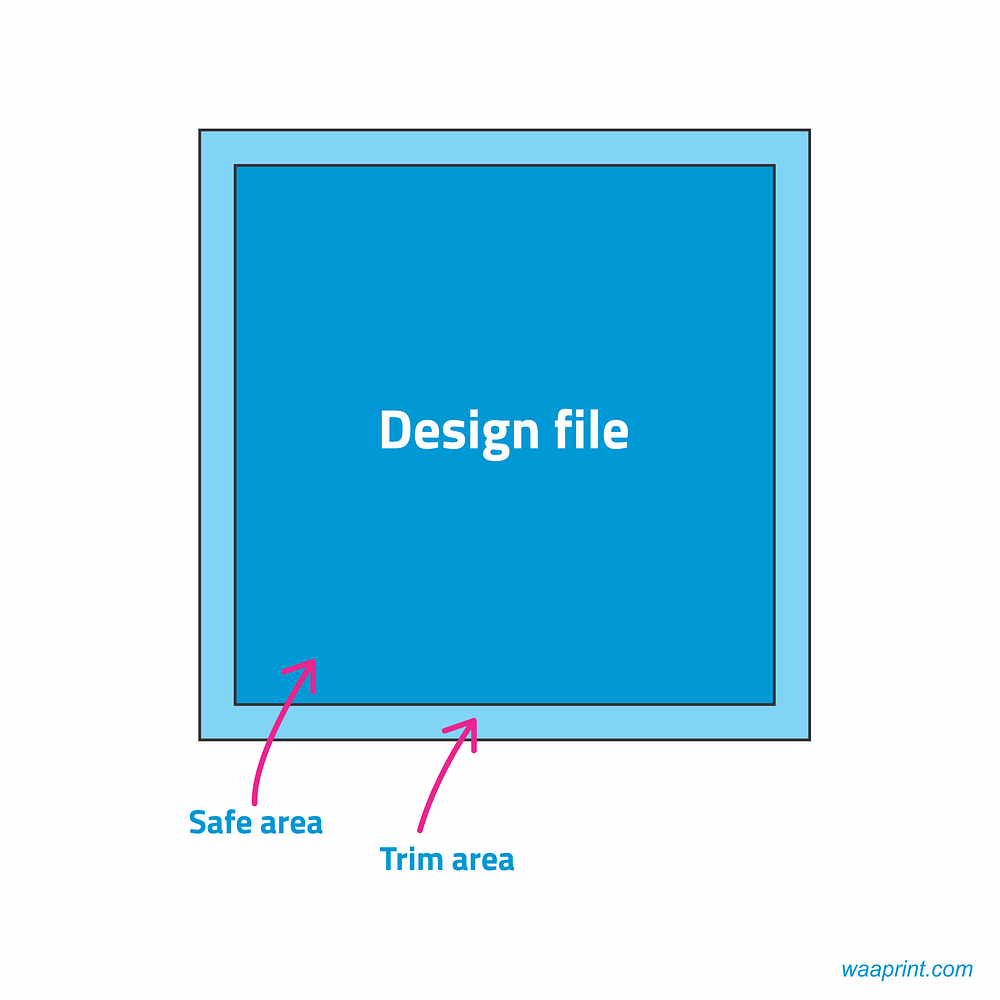
- Bleed is the extra background or image area extending beyond the final cut line.
- Trim line is where the printed sheet is cut to its final size.
- Safe area is the inner area where important text, logos, phone numbers and faces should remain.
As a practical guide, extend backgrounds past the edge and keep important content at least 0.12 inches away from the final cut edge. This protects the design from slight cutting movement and avoids unwanted white borders.
5. Keep text readable
Choose fonts that are easy to read at the final printed size. Avoid extremely thin type, very small text and low-contrast colour combinations.
Before sending the file, zoom out or print a quick proof at actual size. Check that contact details, prices, dates and calls to action can be read easily. Proofread names, phone numbers, URLs and social handles carefully, because corrections after printing may require a reprint.
6. Check images, logos and linked files
Make sure all logos are sharp and all images are embedded or included in the final export. Vector formats such as AI, EPS, SVG and PDF are best for logos because they remain sharp at any size.
If you are sending an editable file, package its fonts and linked images. The simpler option is to send a final print-ready PDF.
7. Export a print-ready PDF
PDF is the preferred delivery format for most print jobs. Export at high quality, preserve the final size, include bleed where needed and avoid unnecessary compression.
You can also send a high-resolution JPEG or PNG when appropriate. AI-generated designs are accepted too, but they should be exported at the correct size and high resolution before production.
Before you send your design
Use this quick checklist:
- Correct product size and orientation
- CMYK colour mode where possible
- High-resolution images at 300 DPI
- Bleed and safe area included
- Text proofread and readable
- Final artwork exported as a high-quality PDF
- No important content too close to the edge
Waaprint provides a free design review before production. Send your print-ready PDF or high-resolution JPEG/PNG, including AI-generated artwork, and we will check it for common print issues before printing.
Use this checklist before ordering business cards, flyers and handbills, brochures or transparent stickers.